Have you ever looked at something ADORABLE and thought, "I can crochet that!" only to look at the instructions and feel like you are trying to read Japanese, or Russian, or something akin to hieroglyphics? Yep. That's me. I try to follow along and end up with a mess. A MESS, I tell you! I made a super cool beanie with a beard attached for my brother's birthday a couple of weeks ago...but can't get the picture to upload from Facebook. Grr. Trust me, it was cool! Anyway, that super cool and simplistic beanie was a beast to make. It took me three days to complete...because I had to rip it apart and crochet it SIX DIFFERENT TIMES! Yep. You read that right. So, my husband suggested while I was in the middle of a tirade about the stupidity of crochet-crypt that I write a tutorial on my findings. A "Crocheting a Beanie for Morons" if you will. Since I am one. :) Ready? I hope I can help someone.
Gather your supplies!
I am using a 5mm weight yarn because it's what I have on hand. It's pretty generic and easy to find, mine is by Red Heart.
I am also using a J 6mm crochet hook. It's my go-to hook and I pretty much use it on everything. I know that I shouldn't, but I don't really care. ;) It makes me happy because it works on pretty much EVERYTHING. :)
**DISCLAIMER**
I STINK at all of the counting that crocheting entails, so I will be omitting most of the counting and judging everything by eye. I honestly think that I am numerically dyslexic--anything involving numbers usually leaves me in tears wondering where I went wrong, so I just avoid it when at all possible. :) So this tutorial may be of help to people like me.
Okay, first thing you need to do is make an overhand or slipknot. I only recently started using a slipknot, either will work, trust me. Then you will start chain stitching. This is done by pulling the yarn that is attached to the skein around the back of the hook, hooking it and pulling through the loop that is already on your hook. Make any sense?
 |
Do this five times and you will have five chain stitches.
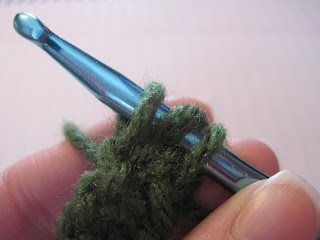
Tada! Now, rotate that back around and put your hook through the first chain, then pull the yarn from around back again and pull through. This will make a circle.Now, you are going to do what is called an increasing stitch. This consists of doing two double crochets inside one stitch. Are you lost yet? lol Wrap your yarn around the hook, then insert your hook into the nearest chain to the left. Wrap the yarn again and pull it through ONE loop of yarn...this would be the chain you just went through. You will now have three loops of yarn on your hook. Like so:
Now You are going to wrap your yarn around again and hook/pull it through the first TWO loops. It will magically leave you with two! See?
Wrap, hook, hook and pull through those two loops (at one time) and your first double crochet stitch is done!
Now, repeat those steps in the same chain and you will get this:
Repeat those steps all the way around the circle and get this:
Start the process again in that next chain (always work to the left) for another full circle, giving you two "rows". You can do three rows of this stitch, if you like. I don't feel like crocheting is an exact science; if it were, why are there SO MANY different tutorials? lol Here is where it starts to get a little confusing. On your next row, you will start a pattern of stitches: One double crochet in a chain, two double crochets in the next chain, one double crochet, two double crochets...Making sense?
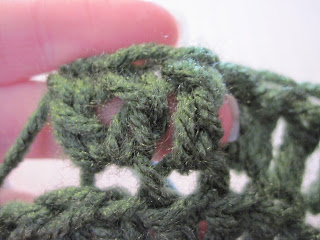
Can you see the stitches? Look down there in the chains. Keep stitching away at the crown, this is the top of the hat. Four rows typically makes an infant/child's sized hat. My hubby has a big head and seven rows works well on him. However, this also depends on the size hook/yarn you use, so you will have to keep in mind that it may vary. This is what the crown will start to look like:
When your crown is the size you need, you can start doing just one double crochet in each chain, this will stop increasing the crown and you will see it start to form a tube after a few rows. I made 8 rows on my hubby's, but didn't finish it off because I was a dummy last time and didn't count how many rows fit him properly before I gave the hat away. So he will get a beanie with a skein of yarn attached tomorrow. ;) It looks like this right now:I don't know why it won't turn the right way. lol Feel free to ask my any questions! I am still new at this process too, so I'm definitely not an expert! Happy hat-making!!


I'm going to try this Jocelyn and let you know how it goes! Thanks! :)
ReplyDelete~Kayla